NOTE: Shanethenurse is a gentleman I consider a friend, is a prepper, and someone I met on Facebook of all places well over a year ago. We continue to be in touch, chat from time to time, and he offered a few posts around first aid, medicine, etc. since this is an area I am lacking on the site. Shane, I appreciate the effort, and thank you VERY MUCH. —
You are out in the woods one day splitting fire wood and you miss the log and connect with your leg instead cutting a deep gash. Unfortunately you are miles from nowhere and there is nobody that can help you. What do you do?
If you are prepared you can take care of that wound properly and be well on your way to a full recovery.
First you need to control the bleeding with direct and constant pressure until the bleeding has stopped. Do not use a tourniquet.
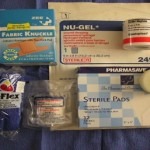
After the bleeding has stopped was out the wound with water until it is clean and any debris has been removed. Now cleanse the wound and surrounding area with Providone Iodine which is available at most pharmacies relatively cheaply. Flush the wound with water again, not creek water, nice clean, microbe free water from an unopened bottle if possible.
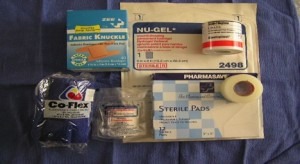
Once the wound has been cleaned assess the damage, how deep it is, how wide it gapes. If it can be closed with an adhesive wound closure strips, aka steri strips, or by using the skin closure glue cyanoacrylate (Dermabond, Krazy Glue) then do so.
When using the glue and strip method this is how I do it in the ER. Bring the wound edges together and apply the glue, some people put the glue in the wound but I do not. While the glue is still tacky apply the adhesive strip to reinforce the glue and maintain the closure. Once the glue has dried apply a gauze dressing and since we are talking about a lower leg wound apply an elastic bandage, ACE wrap, to keep pressure on the wound and decrease swelling. Glue and strip is my preferred method for wounds of the face when at all possible.
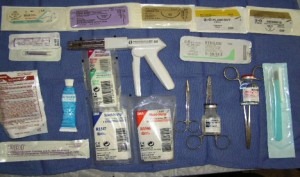
If the wound is deeper and needs a few stitches, the steps are very similar. Break out the instruments; 2 forceps, scissors, and the suture of an appropriate size. When it comes to suture material, the bigger the number the smaller the diameter of the line. Suture material is generally available at any place that sells farm or veterinary supplies, such as Tractor Supply Company.
To begin place the needle in the jaws of one of the forceps, sterilized needle nose plier will work if you have nothing else. Hold the wound together as best you can, this is where a helper would be great or you could use an adhesive strip to keep it together while you sew. In the ER I would most likely inject Lidocaine into the surrounding tissues to decrease the pain of the needle insertion. It is very unlikely Lidocaine will be available for this situation. The idea with suturing is to bring the wound edges together. Sometimes this is not possible due to tissue loss or the shape of the wound. So try and get the edges as close to normal as possible without pulling them too tight. Some people say to start at the middle, some at one or the other. It does not really matter where you start so long as to wound is closed properly and somewhat resembles what it looked like before the wound. Since we are using the adhesive strips to keep the edges together this will be a breeze.
Take the forcep with the needle and insert the needle 2–4mm from the edge of the wound and drive it down about 25% of the length of the needle before starting to curve it back up the other side. Pull it through until there is around 4 inches of line left, at this point you will tie the knot. We generally use a square knot which may need to be repeated up to 7 times depending on the suture material used, because you do not want all that hard work to come undone. Cut the line leaving around 1/2inch on each tail. Repeat until the wound is completely sutured. Once the suturing is done apply an antibiotic ointment topped with a gauze and then wrapped with a tension bandage. Give it a week and then remove the sutures.
If the wound is very deep then a Mattress Stitch may be needed. To do this you insert the needle approximately 4mm from the edge of the wound and drive it down far enough, roughly between 1/ 3 and 1/ 2 the needle, so that when it comes up and out the other side it is 4mm from the edge. Reinsert the needle closer to the edge of the wound on the same side that you just exited then cross the wound and bring it up on the other side near the edge. Then tie the knot., be sure the wound edges are together first. Repeat until the wound is closed.
Now what I just described is an all alone SHTF way to sew yourself up when you have no other options. I do not claim to be the be all, end all of suturing and a lot of what I explained was written for the average person to follow to get the job done until they can get in and be seen by a physician.
If you want to get a little practice before you actually need to do this, get a Chicken or Turkey and practice suturing the skin back together
At all times watch for signs of infection such as redness and swelling that is hot to touch, or a foul smelling drainage. If the dressing gets wet change it at as soon as possible
Contrary to what our parents and grandparents have told us, letting the wound breathe by keeping it exposed to air is one of the worst things you can do. Moist, not wet or dry, is the best way to heal a wound. Using a layer of antibiotic ointment covered with a simple gauze dressing will do this just fine.
For wounds of the scalp under the hair I like to use staples. The downside to staples is that you will probably need an assistant and you need a special staple removing tool. I have seen surgical staple guns at farm supply stores also. The technique is essentially the same as suturing, except that you pull a trigger instead of tie a knot.
Here a few references:
- Ditch Medicine by Hugh L. Coffee is a great book and one of my surgeon friends recommends it. ISBN 13: 978–1‑58160–390‑3
- Boston University Suturing Basics by Wayne W. LaMorte MD
- www.bumc.edu/generalsurgery/technical-training/basic-knot-tyinguturing/
- The Ethicon Knot Tying Manual is a great resource also if you can find one.
- Click to see larger image





\Contrary to what our parents and grandparents have told us, letting the wound breathe by keeping it exposed to air is one of the worst things you can do.\
I’ve always left small cuts and abrasions breathe rather than cover with a bandaid. Is there an \always cover\ rule? If the SHTF, I think I would be more careful with cleaning the wound and covering than I am now, knowing antibiotics are available. I am also youngish and healthy. But, with all the drug resistant bacteria, I guess I should be careful. I had two friends that got nasty infections that took months to heal. One merely hit his shin. The other is a nurse and got a MRS infection.
Thanks for this post!!
I liked the post and feel it is useful. But, if you are out in the woods (or almost anywhere) the odds are you won’t have a wound kit with you. I have an awesome first aid kit, but because it is so complete it is just a little smaller then a carry on bag. If I need this first aid kit I better be home because i’m not gonna shlep it around with me. I have a small first aid kit that I do carry with me when I hike or travel but it is minimal. I have a larger kit that is suitable for longer trips or in the motor home. But I know if I suffer a serious injury the odds of having a kit like what is described in the post is slim to none.
Interestingly, I supplement all my kits with a small wound care/suture kit from Adventure Medical and add a few more items in the event that I need them. All my first aid kits get this added to it. Fortunately, I have not had the occasion to have to use it, but with knives, rocks, and sticks out in the field, you never know.
In addition, I also carry cayenne pepper in my kits as well, because it has properties that help clot the cut if need be. It is much less expensive than Celox or Quick Clot:
http://lifehacker.com/5824693/use-cayenne-pepper-to-heal-small-cuts
The type of supplies I list here should be at every preppers bol, or home. They are really quite cheap. Sounds silly but even if you do not have the skills to use it you may have a friend with the skills.As for in the woods, that was just an example, imagine cutting yourself in glass or metal in the city. A small alcohol or iodine prep pad, one suture or steri strip packet and a leatherman type tool can easily becarried in the pocket or a small pack.
I hardly ever go out in the woods, but I carry a first aid kit with me everyone including an Israeli bandage and quick clot. But this is great additional knowledge to have.
Great post Shane, thanks … watch out chickens. Do you have any idea how long an unopened ampule of lidocane will still be useful beyond the printed expiration date? I ask because I saw some information from Dr Bob on a study done by that army that found that many Rx’s are worth keeping even after they expire.
Mr-Jones, I have used lidocaine 8 years old with good effect. A lot of meds lose a miniscule amount of effect after expiration. Like the dates on food they are mostly a recomendation. I will look into this and compose an article in the coming weeks.
Excellent post Shane, thanks. I have training in basic first aid, can you recommend / suggest a more advanced training package, but more importantly — how we can use these skills for real, without having to quit my job and become a paramedic 😉
Great info, although I do have one small criticism. If bleeding is not easily controlled or is of the bright red, spurting type, then a tourniquet is most definitely called for. If you can throw on a tourniquet and slow the bleeding, that gives you a little more time to fool around with direct pressure. If the wound is bad enough, you might have lost enough blood to cause weakness and the inability to maintain direct pressure on yourself. This is especially true in a wound such as a femoral or brachial artery where one can potentially bleed out within minutes.