This article is by Cameron Green, of Green Academy of Personal Protection (GAPP).
 In 2003, the northeast of the United States (as well as parts of the midwest and Canada) suffered a severe power outage. Traffic lights were not working so gridlock was rampant.… the subways and other mass transit were not working so peoples normal commute was anything but.… many were left stranded and tried to find a hotel… some people began walking. Cellular networks were either jammed with traffic or had no power and traditional communication was difficult or non-existent. Living in central NJ, my lights flickered but I was lucky enough to have power. I began checking local repeaters for causes and quickly learned of the situation. I spent several hours talking to ham radio operators stuck in traffic or walking home from work…most were unable to make calls home to their families. My landline and cell were working so I made a few calls to families letting them know mom or dad was safe but would be late or home tomorrow. This is a prime example of why ham radio can be invaluable.… and in my opinion, there is no reason not to be involved in amateur radio.
Ham radio (and communication in general) is an area most preppers overlook…unfortunately in many cases due to cost. I recently came across a few low cost hand held radios and decided to try a low budget radio project. For those of you that don’t know what a handheld is (or handi talkie in ham speak), it is similar to the popular FRS/GMRS radios available in most sporting goods stores…but a handi talkie has a wider range of frequencies and in most cases is programmable. It allows the user to operate on the VHF and UHF bands (very high frequency and ultra high frequency) which allows for line of sight communication or long-distance communication via repeater. The minimum license required to operate on these bands is the technician class. For information on licensing, check with your local ham radio clubs, the American radio relay league (ARRL), or the FCC website. You will find obtaining a technician class license is quite easy to do and, given this low cost alternative to more expensive high end radios, there is very little reason not to get your ham radio license.
My goal was to put together a ham radio rig that I could use both as a handheld and while driving in my vehicle, while staying under a $200 budget. In order to achieve this, I needed a handheld radio, an external antenna (and any necessary adapters), and a car charger. Other items come in handy at times, but my primary goal was to stay under budget and have a decent entry-level radio rig, so I figured the extras may have to wait.
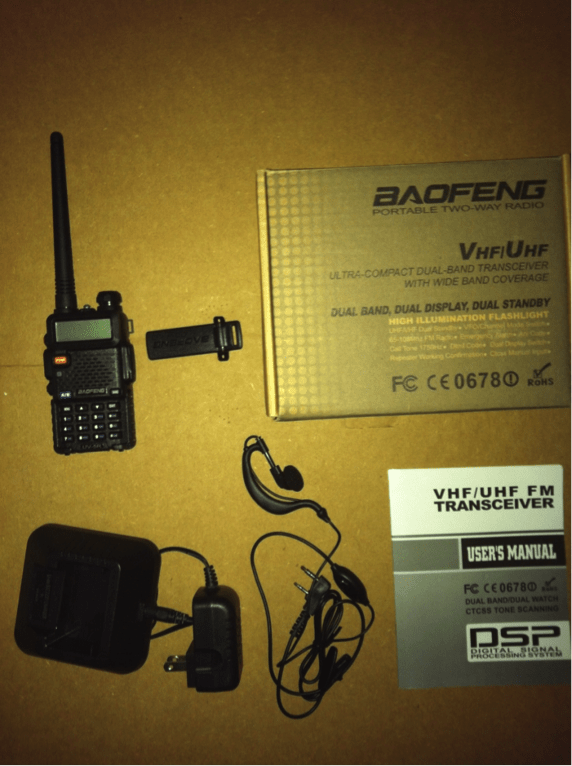
I decided on the Baofeng UV-5R as my radio… simply because they can be purchased for under $50 (at the time of purchase, mine was $42) and have a reasonable review rating. As with anything else, you get what you pay for, and as of writing this, I cannot attest to the long-term durability/reliability of this radio, but my initial tests are promising. The UV-5R is a compact hand held transceiver providing 4 watts or 1 watt of output in the frequency range 136–174 MHz and 400–480 MHz, it also receives on 65 — 108 MHz (which includes the regular FM broadcast band). It has a dual watch and dual reception feature which comes in very handy and the user can easily toggle between the two frequencies for transmission. It has 128 memories, battery save function, VOX, DCS/CTCSS encode, key lock and built in flashlight. It comes with a ANT5 SMA‑J flexible antenna, BL‑5 Li-ion battery (7.4V 1800 mAh), belt clip, wrist strap, AC adapter (8.4V 600ma), ear bud/mirocphone, and drop-in charging tray. All in all, it is a good basic unit and more than reasonably priced. As with most handhelds, many of the features are buried in menus and understanding the abbreviations on the LCD screen takes time. One word of warning I will give here is the manual is very poor. It does not explain much or in much detail… as a new user, you may be better off looking online for reviews and directions on how to operate the unit.
I began testing the unit with radio to radio communication and found the range more than adequate given the terrain (well over a mile but don’t know exactly how far). Once I figured out the necessary menus and settings for repeater operation, I began to test the unit with PL tones and longer range communication. Using just the supplied rubber ducky antenna, transmitting on 4 W, I was able to hit repeaters about 10 miles away (note: with the extended range antenna I purchased, I was able to hit repeaters out to 20 miles but my audio was poor). It was reported that my audio sounded good by all that I corresponded with. I was easily able to receive FM broadcast and the local NOAA weather/maritime report… though I speculate reception would be better with a simple wire antenna. I have to say so far I was very pleased with the performance of such a low cost radio.
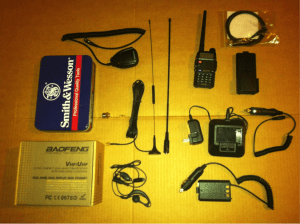
My next step was to try communication from my vehicle. Since my radio was well below budget, I was able to purchase a wide variety of accessories for it and still remain under the $200 cap. I couldn’t find any of the items I was looking for locally (I’m a big fan of supporting local businesses above internet companies) so through a combination of Amazon and Ebay, I purchased:
- Handheld Ham Radio $32
- Handheld speaker Mike $9
- Car battery eliminator $10
- 14 inch rubber ducky antenna $8
- Magnet mount car antenna $16
- Repeater directory $11
- Car charger $8
- PL-259 Adapter and SML f‑f adapter $8
- AA back up battery $8
- Programming CD and data cable $10
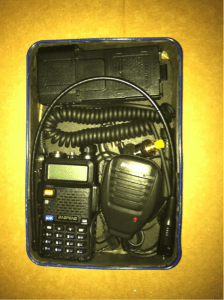
All these items, with shipping, cost me approximately $140.… so I was well below my budget. I found a small tin and lined it with rubber to act as a faraday cage for my radio and whatever else could fit in it. I was able to fit everything in this small tin with the exception of the charging equipment and magnet mount antenna. I don’t know what effect an EMP would have on the charging equipment or the antenna, but if there is no power for charging and my car is useless, what’s the point in protecting it?… protecting the radio unit was much more important and this tin was free (it came with a knife set I received as a gift).
The car magnet mount is easy to install (well duh). I simply attached the magnet to the top of the truck, ran the feed line through the rear window, and hooked it up to my radio. With the standard battery and the external antenna, I was able to hit repeaters (transmit and receive) up to 20 miles away. The magnet for the antenna is small but held well during driving. While driving around my area of operation, I tried the other accessories I purchased and got mixed results:
Car battery eliminator: worked fine but made the radio awkward since I was tied to a12 volt outlet, note: it did not increase the watt output of the radio (which I had worried about)
Speaker/mic: good audio and made using the car eliminator easier
Car charger: charged the battery and still allowed the radio to be used but the upright charging deck may tip over when driving
AA battery pack: a big disappointment… I was able to receive only with this item. I have a similar unit for my Yaesu handi talkie and am able to transmit so this issue was a shock… if I can find a fix for it at a later date, I will post up my results in the comments section below.
Rubber ducky antenna: the results using the rubber ducky were not as good as with the car antenna, but much better than the factory antenna (although it makes the radio a bit awkward to use).
 The last thing I needed to do was program the unit using the programming disk and cable I purchased… another big disappointment. I inserted the disk expecting it to run on its own…I tried it with the radio hooked up through the data cable and without… no dice. I began to look for driver software or some sort of “run” program… its all in Chinese. So I gave up and decided the radio did not need any advanced programming for what I needed it for… and most likely as a new ham radio operator, you won’t need it either.
Conclusion: the Baofeng unit is comparable to all of the high end units I have used (Yeasu, Icon, Kenwood) but costs considerably less… even the accessories are much less. In fact, I was so impressed with this unit, that I bought two (two is one, one is none). It won’t replace the Yeasu handi talkie I keep in my vehicle, but it is a great backup unit I will keep in my second vehicle and/or in my bugout trailer. It turns out the $200 budget I set for myself would cover everything you need to start operating… including gas for you trip to take your technicians class license. As an entry level unit for a new ham radio operator, this unit can’t be beat… and given that its under $200, just about anyone can have a functional radio giving local commo. So get your license, get a radio, and get working on the air waves.






I agree about the importance of ham radio communication in an emergency. I have my Technicians license, and keep my radio in my get home bag. I have a Yaesu handheld, DC car cord and a magnet mount antenna. Thanks for the information on the budget radio, and I may pick one up as a spare, or if it is needed for splitting off in a group for communication.
Thanks for posting this. I’ve been interested in getting into ham radio since playing around with FRS/GMRS but have always been put off by the cost of equipment. Now I see it can be affordable. I just ordered one and a few accessories. Got a license manual and am going to my local club’s technician class (started last Monday but will pick it up next Monday).
Looks like if you want the software to work you need to download different drivers and software than what’s on the disk. Lots of info here: http://www.miklor.com/uv5r/