 I know. Everyone has done a YouTube lesson on how to build one of these inexpensive emergency heaters for your car. Honestly, I had to try it for myself to be sure that it “worked.” Many people use empty steel coffee cans, some people improvise and use what they might have in the garage as a container for the wick/roll of toilet paper. I decided to take a trip to Lowe’s and see if I could find an empty steel one quart paint can with lid. It seemed to be just a little smaller than a roll of toilet paper, and has a lid that can be slipped onto the container easily to snuff out a flame to put the heater out.
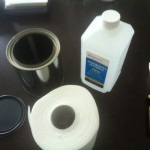
So, here were my components:
- 1 — Roll toilet paper
- 1 — One Quart Paint Can
- 1 — 32 Oz bottle of 70% Isopropyl Alcohol
A little more about each component:
- I used a softer roll of toilet paper, not a single ply 1000 sheet roll.
- I used 70% Isopropyl alcohol based on the recommendation of several YouTube videos because 90% burns off too fast.
- The One Quart paint can was new, did not have paint in it previously, and was never cleaned out with acetone or anything like that. I recommend spending the $1.50 or so on a new can because you do not want fumes of some paint burning in your car or enclosed space if you ever have to actually use this.
That said, I pulled the little cardboard roll out of the center of the toilet paper. Not an easy task. I ended up getting a knife and sliding it in between the toilet paper and the cardboard so that I could separate what was loosely glued in there, and after a few minutes pulled it out.
After that, I then slowly squeezed the roll of toilet paper into the can. This took a good 5 — 7 minutes. You need to squeeze it in there a bit at a time because the lip where the lid fits into is a bit tight. Once it was in, took a look to be sure it was right. It looked kind of weird to me, even though I have seen this done multiple times on YouTube.
I then opened the bottle of Isopropyl alcohol, and slowly started to pour it over the toilet paper. I say slowly because the roll has to absorb the liquid. If you didn’t already guess, the toilet paper becomes the wick for the heater. Pretty big wick! I kept pouring and pouring and pouring until the toilet paper had absorbed the alcohol enough to become saturated, completely… This is a requirement. In fact, There was enough alcohol in the container that it was super saturated and there was excess liquid. Which, at the time was fine with me because I was going to test this thing when I was done making it. For the record, I think I used anywhere between 26 and 28 ounces of Isopropyl Alcohol poured into the heater.
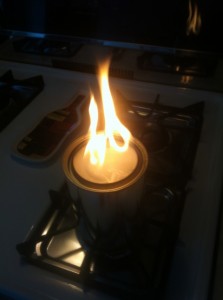
I tested the lid to make sure there was a tight fit. Upon doing so, I realized that the tight fit made this better yet for me, as I could actually store this as is in my truck over the winter, and not have to worry about carrying the can and a bottle of alcohol in the trunk as well… I took the lid off, pulled a lighter out of my drawer, and lit the heater. I was a little concerned immediately, as the flame was about 12 — 18 inches high. My concern was for the ceiling of my truck and the possibility of safety in the truck with such a high flame if I put my rear seat down and placed this on the seat back of my SUV and lit it for heat. I certainly could not put it on the floor of my truck in the front without thinking I was going to melt a plastic component or my glove box. Maybe if I put my front seat back all the way, I might have room. But if I had a passenger or passengers with me this might be out of the question. As it turns out, the flame was high because there was excess alcohol in the container that had to burn off. I was impatient, slid the lid over the flame, and poured a little alcohol off and re-lit the wick/toilet paper. This time the flame was a bit lower.
What I experienced. While I did not actually test this in my car, I was in my kitchen, there was quite a bit of heat that came off of it, which was good. I can see definitely keeping your window cracked while burning this too, as 30% of the liquid “is” water. Therefore there will be water vapor in the air steaming up your windows eventually.
Honestly, I was sufficiently impressed with the heater that realistically cost me about $5.00 or less and 20 minutes at the most to assemble and test. I duct taped the lighter to the side of the can so that it would always be handy. Put it in the trunk of my truck, and there it sits.
Something you think you can do but probably won’t be able to is use this as an alcohol stove. I say this because if you put a pot over it, it is going to put out the flame… However, if you put something around the heater that will hold a pot over the mouth of the heater and not kill the airflow, you may be able to double duty this as a large alcohol stove as well… In fact, if anyone has made any modifications to this type of heater to do so I would be interested in seeing what you have done. I may improvise something this spring when I do some camping and play around with the idea of it to have a dual purpose device…


Gelled chafing fuel may be safer to carry in a vehicle than liquid alcohol. The screw-on capped product is better for preserving the contents for re-use later.
Although, chafing fuel or other alcohol fuels are fairly safe to use indoors, it still consumes oxygen and, in small spaces, will need ventilation.